

I wasn’t sure it would happen, but here I am with a final Christmas card for 2014! Read on to see the card, a speed colouring video and get some updated waffle from me. 😉
The Waffle:
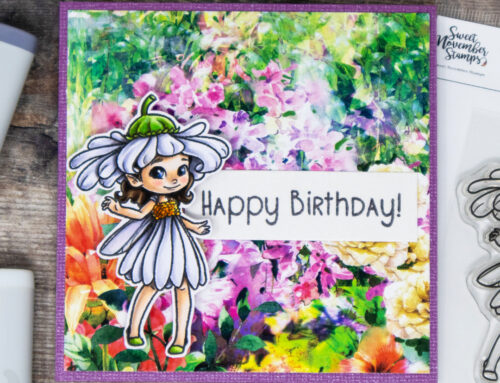
Excuse the photo below, I had to take it in a hurry as this card was sent overseas earlier in December, to my Make it Crafty Secret Santa partner, a fun card/gift swap organised by Zoe in the Make it Crafty Facebook Group. Fortunately it just arrived with the recipient, so I am able to share before Christmas! I really didn’t think I would get to share a new card with you before 2015. Not only that, when I was colouring the image I shot some video footage, so I can also share a little speed colouring video (pretty much the extent of my colouring for December).
Thank you for your messages and kind words following my previous post. December has been a tough month indeed, full of highs and lows.
Mum is home following her accident. She had to have her ankle plated and screwed, and is now recovering from that. Thankfully my brother is on hand to help her and make sure she is safe.
The property we were selling has sold and we have completed and exchanged just in time for Christmas. I couldn’t be happier about that. So relieved.
Taika aka Miss Pig is doing fairly well. We will be talking with her vets following Christmas to go over my notes and the blood glucose results I have been logging.
We’re ready for Christmas. If you celebrate, I hope you are too and that you have a wonderful Christmas and an even better New Year.
The Card:

The Details:
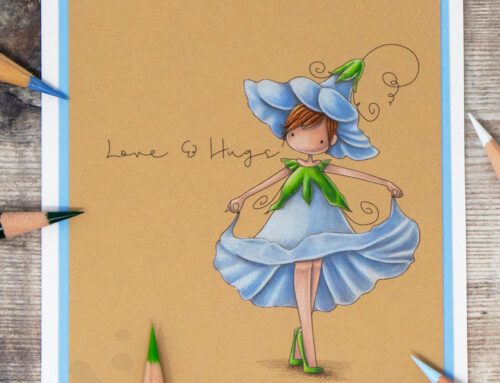
Digital Image: Fairy Poinsettia is available as a digital image direct from Make it Crafty.
Rubber Stamp: Make it Crafty Fairy Poinsettia is also available in rubber from my UK store Quixotic Paperie (you can pick her up as a single stamp, or in the Flower Fairies set with two other images).
As with my Phoebe’s Christmas Wish card, I printed Fairy Poinsettia on my favourite Make it Colour Blending Card before colouring her with Copic markers. I printed her off to one side so that I could cut the A4 sheet down and have her cropped off the edge. The card is A5 size.
Before colouring I die cut the sentiment using a Penny Black sentiment die (Exultations 51-060). The die cut words were coloured to match my image using a red Copic and laid back in to the paper. I love this “inlaid die cutting” technique, which I first saw on Jennifer McGuire’s blog. It works particularly well on clean and simple card designs like this one. I cut a mat from pearlescent white cardstock, which I coloured with my red Copic marker to coordinate with the image. When I put it all together I decided it needed some extra sparkle, so I added Wink of Stella Clear Glitter Brush Pen to the mat layer and die cut sentiment. The stars are from a pack of Studio Calico wood veneers, coloured with a gold WInk of Stella pen.
Copic Speed Colouring Video:
Copic Marker Colour Palette:

For some info regarding Copic reds, please check out one of my earlier posts:

Thanks for stopping by!
I hope you have enjoyed today’s post as much as I enjoyed creating it for you. I will be back in 2015 with more colouring and crafting fun to share with you. Again, thank you so much for your support throughout 2014, it is hugely appreciated!
Don’t want to miss out on future posts? Subscribe to my RSS feed in your favourite blog reader or subscribe via email using the form over in the sidebar.
Leave A Comment